
Create A Wide Configuration For Running Cypress In GitHub Actions!
What is a wide configuration? What should the configuration be like? And why is it important to dedicate time to this?
In the article, we will try to answer these questions, using the following technologies as examples: Cypress as a testing framework and GitHub Actions as a CI/CD tool.
So, imagine you've decided to buy a car. Do you want to add any options? Perhaps automatic transmission. Winter tires. Climate control, or something else?
A testing framework without a well-thought-out configuration is like a car without options. It can get you to your destination, but the journey is unlikely to be comfortable.
Under the 'wide configuration,' we understand the ability to pass the most important options and/or arguments to your testing framework.
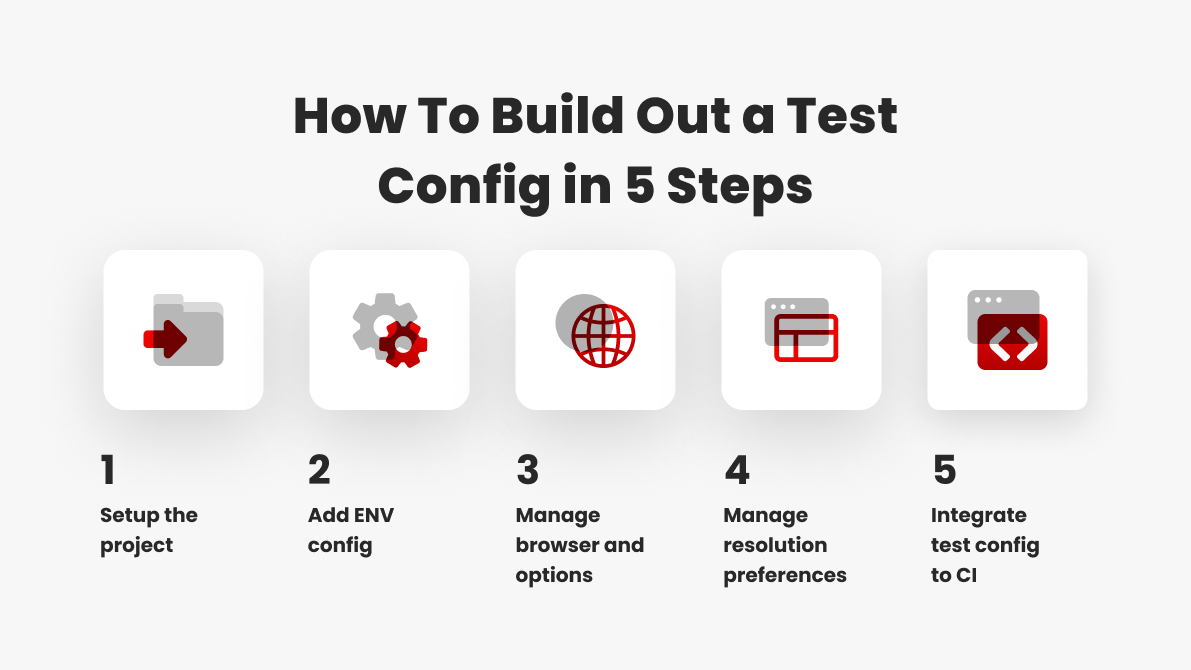
Explaining in detail we must be able to easily run the tests in any %put the item from the list below% we want.
- ENV [Environment, like DEV, UAT, PROD, etc]
- Browser [Chrome, Edge, Firefox, etc]
- Resolution [laptop, mobile, tablet]
The following article won't contain examples of Safari usage because its configuration will be defined in a separate article.
In our example, we will build out the configuration using a default Cypress Project. You can apply this config to your project or check out the final configuration in github.
Environment configuration
Let’s start with a test example, look at this simple test below. The URL used in the test can be easily replaced with your project environment's URL.
To accomplish this, Cypress utilizes environment variables. You can find detailed information about this here.
example.cy.js file:
describe('spec', () => {
 it('test example', () => {
	cy.visit('https://example.cypress.io/');
	});
});
In order to easily provide environment-related data as we desire, we need to start with adding dotenv and cross-env package dependencies. Then add a script to open cypress with a specified environment.
package.json file:
{
"name": "techfabric.cls",
"version": "1.0.0",
"scripts": {
"cypress:open": "cross-env E2E_ENV=.dev cypress open"
},
"dependencies": {
"cross-env": "^7.0.3",
"cypress": "^13.6.4",
"dotenv": "^16.3.1",
"typescript": "4.6.3"
}
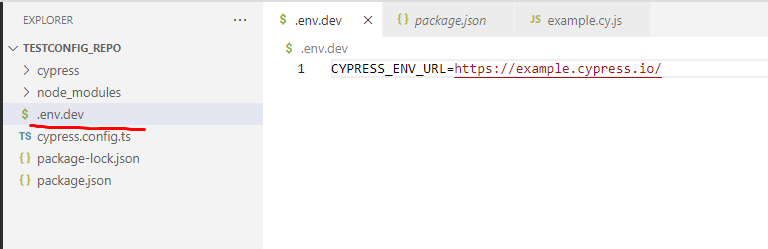
} Now create .env.dev file with url env variable:
Then change cypress.config.ts configuration:
import dotenv from 'dotenv';
dotenv.config();
require('dotenv').config({ path: `.env${process.env.E2E_ENV}` });
const { defineConfig } = require('cypress');

module.exports = defineConfig({
 e2e: {
  setupNodeEvents(on, config) {
   config.env.url = process.env.CYPRESS_ENV_URL;
   console.log(config.env);
   return Object.assign(config);
  },
  baseUrl: process.env.CYPRESS_ENV_URL,
 },
});
The final part is to update the test itself:
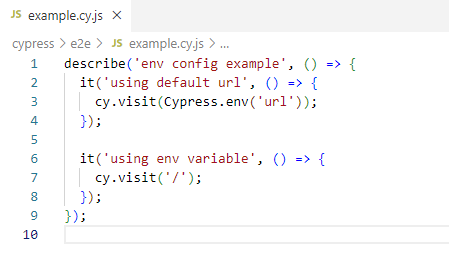
From this moment, we simplify variables management for cases when we jump from one environment to another, everything we need is just to pass the correct .env file (or set of environment variables) to Cypress.
Browser Configuration
Up until this moment, we have been using the default or selected browser.

The next step is to be able to use the chosen browser with preferred options. To make this happen:
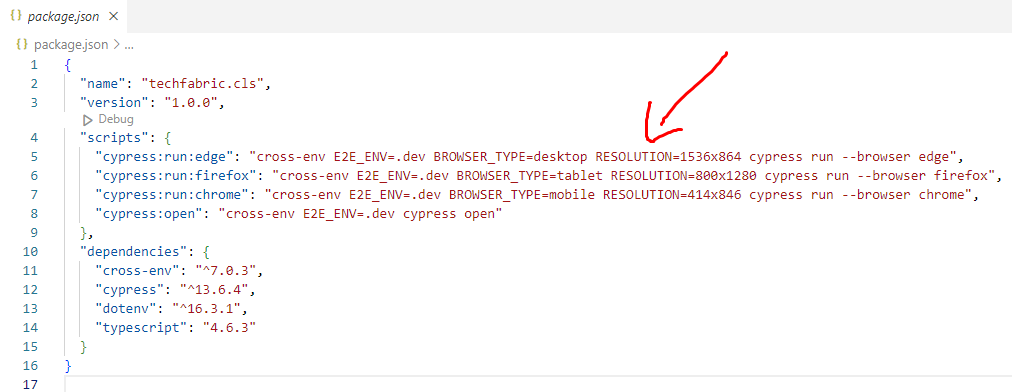
- Update package.json scripts with chosen browsers:
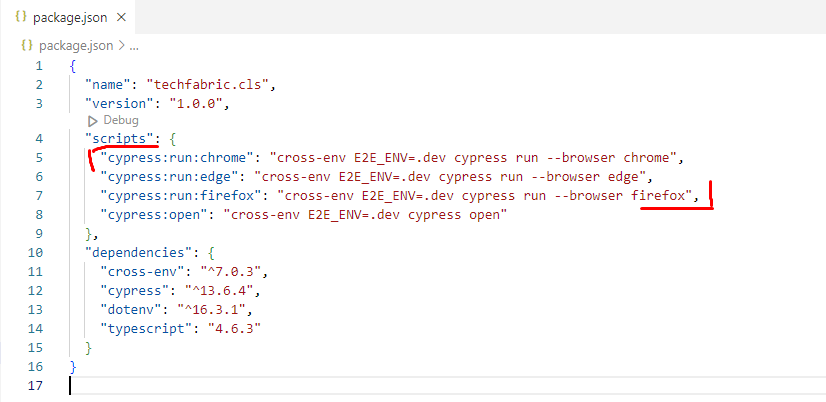
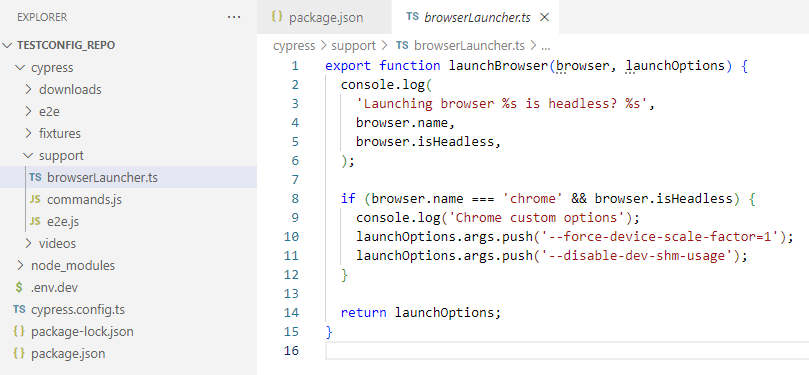
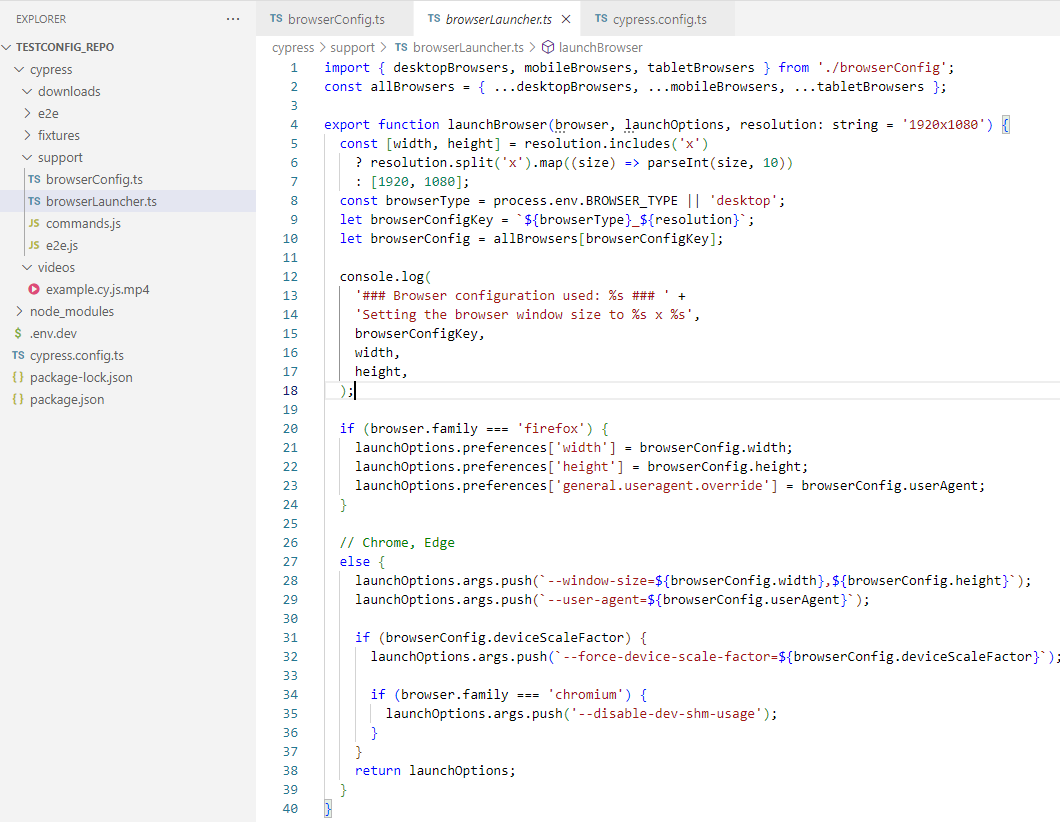
- Create browserLauncher.ts file in ‘support’ folder and provide desired arguments
- Update setupNodeEvents method:
setupNodeEvents(on, config) {
  on('before:browser:launch', (browser, launchOptions) => {
  return launchBrowser(browser, launchOptions);
  });
  config.env.url = process.env.CYPRESS_ENV_URL;
  console.log(config.env);
  return Object.assign(config);
}
In result we can run any pre-defined browser and pass custom arguments.
Resolution Preferences
Defining resolutions is a bit more complex… So, before we begin with the code let’s agree on some criteria:
- Framework must support desktop / mobile / tablet resolutions.
- Desktop resolutions: 1920x1080, 1536x864.
- Mobile resolutions: Samsung S10 (360x760), Samsung Note S9 (414x846).
- Tablet resolutions: Samsung Galaxy Tab A (810x1080), Google Nexus 9 (800x1280).
- Framework must take resolution as a single and clear argument, so we don’t need to pass many details via cmd.
- Browser object must be as close to the real one, as it could be.
The task seems to be quite simple since we can just pass viewport options:
viewportWidth: width,
viewportHeight: height,
But in this case, we won’t handle such important things as:
- userAgent
- deviceScaleFactor
- mobile type
- orientation
- etc
To handle all advanced options we start with resolution objects creation.
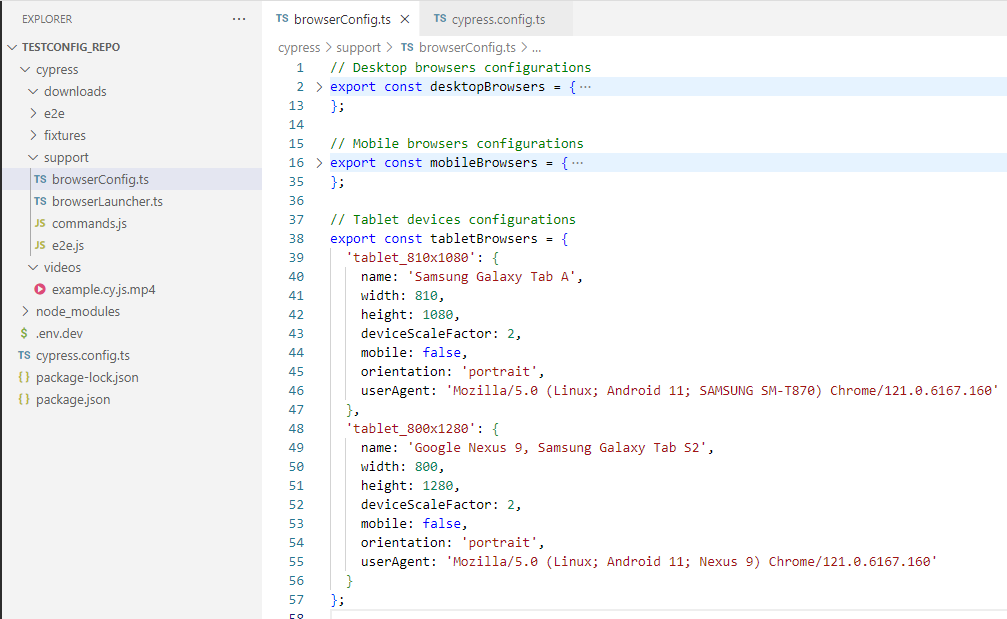
- Create browser config file with resolution specification and objects.
// Tablet devices configurations

export const tabletBrowsers = {
 'tablet_810x1080': {
  name: 'Samsung Galaxy Tab A',
  width: 810,
  height: 1080,
  deviceScaleFactor: 2,
  mobile: false,
  orientation: 'portrait',
  userAgent: 'Mozilla/5.0 (Linux; Android 11; SAMSUNG SM-T870) Chrome/121.0.6167.160'
 },
 'tablet_800x1280': {
  name: 'Google Nexus 9, Samsung Galaxy Tab S2',
  width: 800,
  height: 1280,
  deviceScaleFactor: 2,
  mobile: false,
  orientation: 'portrait',
  userAgent: 'Mozilla/5.0 (Linux; Android 11; Nexus 9) Chrome/121.0.6167.160'
 }
};
- Update browserLauncher, now use resolution and browser type from browserConfig file:
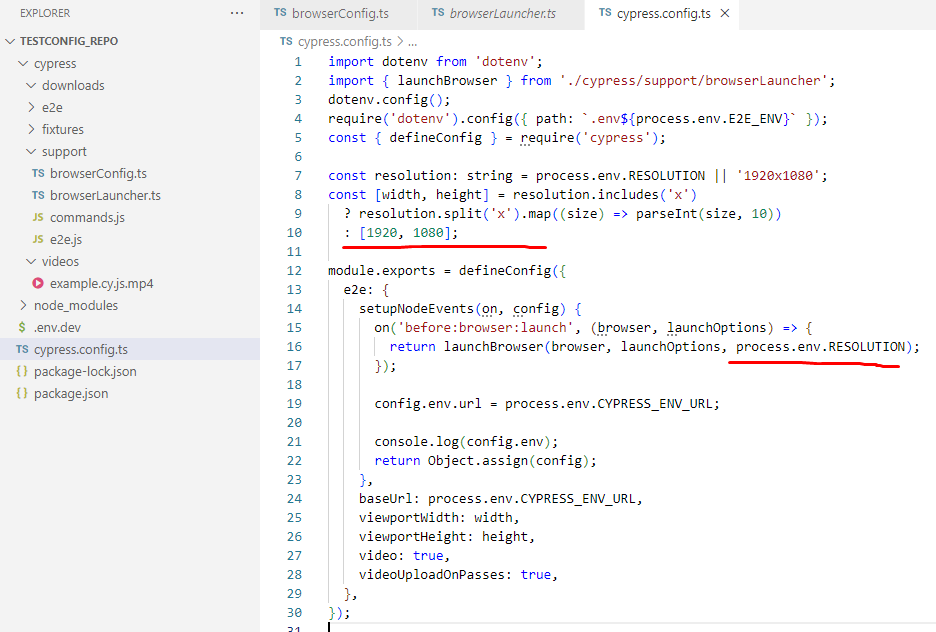
- Update cypress.config.ts, now pass resolution and set viewport options
- Update package.json scripts:
As a result of the previous setup, we can run the tests in the chosen environment, using the preferred browser with the desired resolution and capabilities. Now time to integrate it to CI/CD so everyone benefits from the tests.
CI/CD Integration
name: Run Cypress using Wide Configuration
on:
workflow_dispatch: # allow for manual execution
inputs:
choice_browser:
type: choice
description: Select browser
options:
- chrome
- firefox
- edge
choice_environment:
type: choice
description: Select environment
options:
- dev
- uat
- prod
choice_platform:
type: choice
description: Select platform type
options:
- desktop
- tablet
- mobile
choice_resolution:
type: choice
description: Select screen resolution
options:
- 1536x864
- 1920x1080
- 360x760
- 414x846
- 810x1080
- 800x1280
jobs:
cypress-tests:
name: Run Cypress
runs-on: ubuntu-latest
environment: dev
steps:
- name: Checkout repository
uses: actions/checkout@v3
- name: Install dependencies
run: npm install
- name: Run tests in ${{ github.event.inputs.choice_browser }}-${{ github.event.inputs.choice_resolution }}
run: |
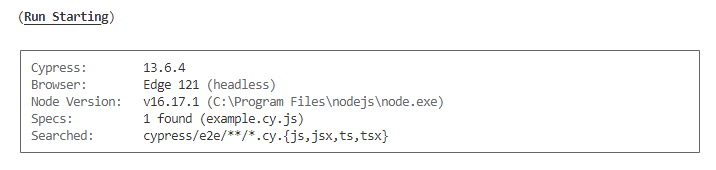
npx cross-env E2E_ENV=.${{ github.event.inputs.choice_environment }} BROWSER_TYPE=${{ github.event.inputs.choice_platform }} RESOLUTION=${{ github.event.inputs.choice_resolution }} cypress run --browser ${{ github.event.inputs.choice_browser }} After configuration is applied, we can start the test run, just select your options from the list in boxes:

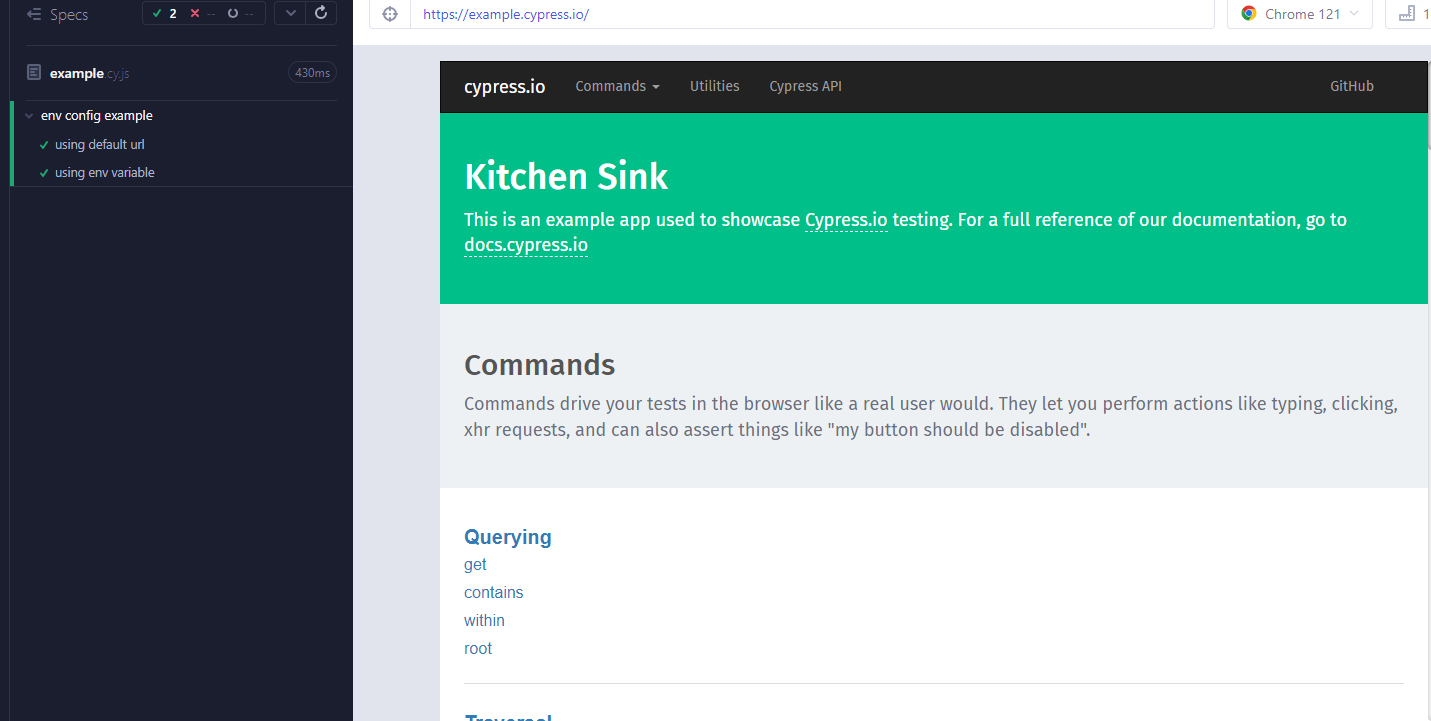
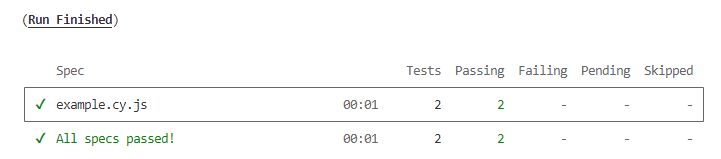
And check the result:
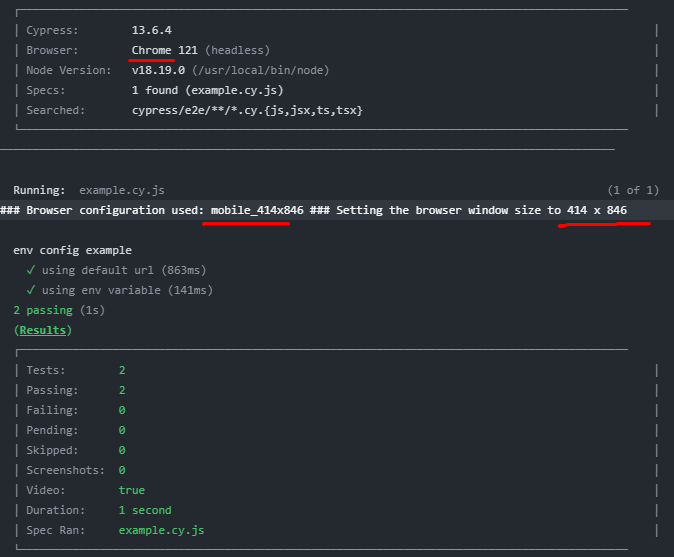
Summary
Today, we've reviewed how to build a testing framework that is flexible enough to accommodate client needs such as custom environments, browsers, options, and resolutions.
We've also integrated everything into CI, so not only the development or automation QA team can benefit from our solution, but everyone on the team can run the test suites with just a few clicks.
Check out this test project in our GitHub repository and apply useful configuration parts to your project. Good luck and see you later!
